Ceiling Makeover: Repairing Orange Peel Texture with Ease
February 15, 2025
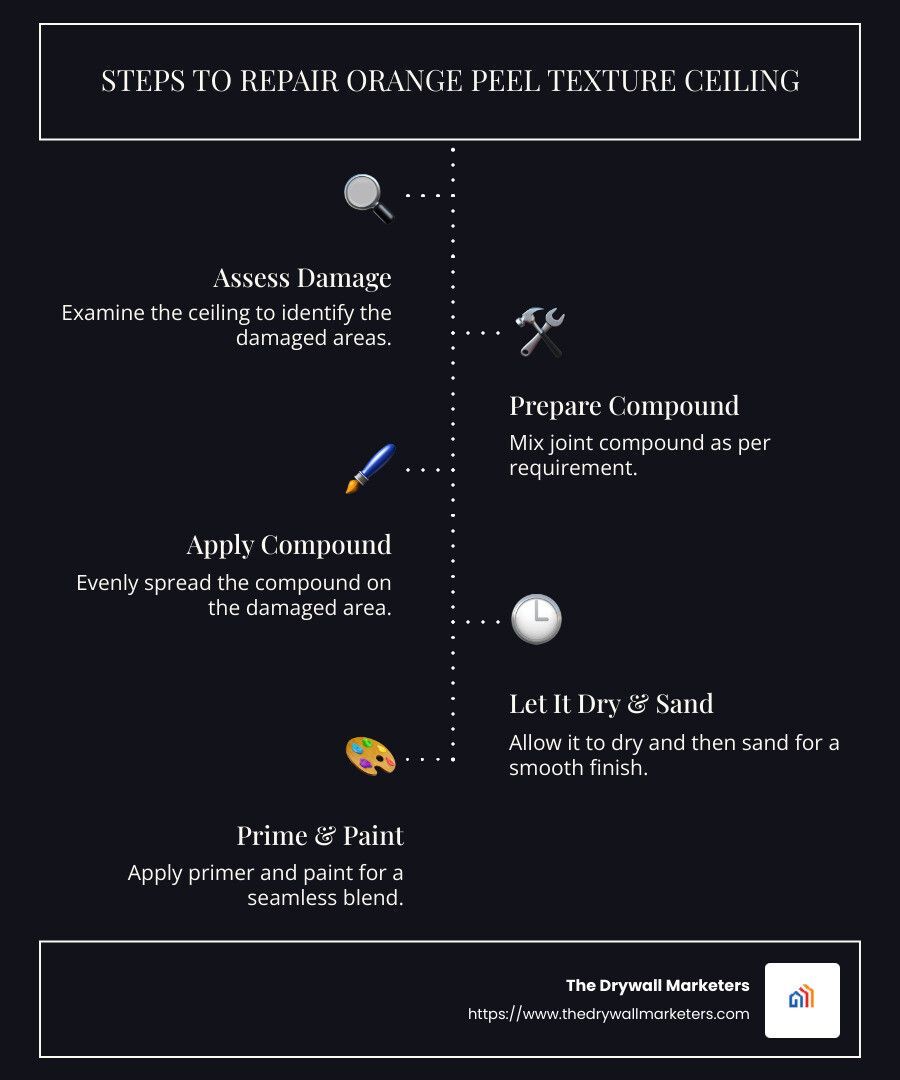
Orange peel texture ceiling repair can seem tricky, but it's easier than you might think. The orange peel texture is a popular choice for ceilings, giving a smooth yet subtly bumpy finish that hides imperfections beautifully. Repairing it is entirely doable with a few simple techniques:
- Assess the damaged area.
- Prepare and apply the compound.
- Let it dry and sand the area.
- Prime and paint the ceiling.
For those ready to tackle these projects, I'm Elisa DeFoe, and changing challenging tasks into manageable steps is my expertise. With years of experience, especially in drywall services, I help contractors tackle orange peel texture ceiling repair efficiently, ensuring projects look flawless.
Understanding Orange Peel Texture
When it comes to ceiling textures, orange peel stands out for its unique and practical design. Named for its resemblance to the surface of an orange, this texture features a series of small, round bumps that create a soft, dappled effect. It's a popular choice for both walls and ceilings because it effortlessly conceals imperfections and adds a layer of durability.
Texture Types
There are various ceiling textures, each with its own aesthetic and functional benefits. Here are some common types:
- Knockdown Texture: This is a more pronounced texture, often used to add a rustic feel to a space.
- Popcorn Texture: Known for its sound-dampening properties, this texture is often found in older homes.
- Crow’s Foot: This pattern is created using a brush and leaves a unique, fan-like texture on the ceiling.
Among these, the orange peel texture is favored for its subtlety and ease of maintenance.
Ceiling Texture
Applying and repairing ceiling textures requires understanding the material and technique. The orange peel texture is typically applied using a sprayer loaded with joint compound. The compound is sprayed onto the ceiling in a fine mist, creating the desired bumpy surface.
For repairs, a similar approach is used. A spray texture product can be employed to evenly distribute the compound, ensuring that any patched areas blend seamlessly with the existing texture.
Blending Techniques
Successfully matching the new texture with the old is crucial. This often involves feathering the edges of the repaired area to ensure a smooth transition. Practicing on scrap material can help perfect this technique before applying it to the actual ceiling.
By understanding the characteristics and application methods of orange peel texture, you can confidently tackle ceiling repairs and achieve professional-looking results.
Step-by-Step Guide to Orange Peel Texture Ceiling Repair
Repairing an orange peel texture ceiling may seem daunting, but with the right approach, it can be straightforward. Here's a simple guide to help you through the process.
Repair Techniques
- Assess the Damage: Begin by examining the damaged area. Determine if it's a small patch or a larger section that needs attention. For minor issues, products like the Homax Texture Touch-Up Kit can be very effective.
- Prepare the Surface: Before applying any texture, ensure the ceiling is clean and free from loose debris. Patch any holes with joint compound and sand the area smooth.
- Mix the Joint Compound: Combine premixed wallboard compound with water until it reaches the consistency of pancake batter. This will ensure it sprays evenly.
- Apply the Texture: Use a hand-pump sprayer or an aerosol spray-texture product to apply the compound. Hold the sprayer at a consistent distance from the ceiling and apply in even, sweeping motions.
Blending Techniques
- Feather the Edges: When applying texture to the ceiling, start from the center of the repair area and move outward. Lighten the pressure as you reach the edges to blend with the existing texture.
- Practice Makes Perfect: It's wise to practice on scrap wallboard or cardboard. This helps you get a feel for the sprayer and perfect your technique before tackling the actual ceiling.
Finishing Touches
- Dry and Sand: Allow the applied compound to dry completely. Once dry, lightly sand the area with 220-grit sandpaper to smooth out any peaks and create a uniform texture.
- Prime and Paint: To achieve a seamless look, apply a stain-blocking primer over the repaired area. Follow up with a coat of paint that matches the rest of the ceiling.
By following these steps, you can master the art of orange peel texture ceiling repair and restore your ceiling to its former glory. Patience and precision are key to achieving a flawless finish.
Tools and Materials Needed
Repairing an orange peel texture ceiling requires some specific tools and materials. Here’s a breakdown of what you’ll need:
Essential Tools
- Putty Knife: A wide putty knife is crucial for applying joint compound smoothly and scraping off any loose plaster. It helps in creating a seamless finish by blending the new texture with the existing one.
- Sandpaper: Use 150-grit for initial sanding to remove high spots and 220-grit for a smoother finish. Sanding ensures the surface is even before applying new texture.
Key Materials
- Joint Compound: This is the primary material for creating the texture. It should be mixed to the consistency of pancake batter for easy application. Joint compound is versatile and can be used for patching holes and creating texture.
- Spray Texture: For a quick and uniform application, a spray texture product is ideal. It saves time and provides a consistent finish, especially useful for larger areas.
- Stainblocking Primer: This primer prevents any stains from bleeding through the new paint. It's essential for achieving a clean, uniform appearance after repairs.
Each of these tools and materials plays a crucial role in the orange peel texture ceiling repair process. Having them on hand ensures that you can tackle the job with confidence and achieve professional-looking results.
Common Challenges and Solutions
Repairing an orange peel texture ceiling can be tricky. Here are some common challenges you might face and how to tackle them effectively.
Matching Texture
One of the biggest problems is matching the new texture with the existing one. The orange peel texture is known for its bumpy, irregular surface, similar to an orange's skin. To achieve this:
- Practice First: Before applying the texture to the ceiling, practice on a scrap piece of drywall. This will help you get a feel for the spray pattern and consistency needed.
- Use Spray Texture: A spray texture product can provide a uniform finish. Adjust the nozzle to match the size of the bumps on your existing ceiling.
- Blend Edges: When applying the new texture, feather the edges to blend them seamlessly with the surrounding area. This avoids visible lines or transitions.
Blending Edges
Creating a seamless transition between the repaired section and the existing ceiling is crucial for a professional look.
- Irregular Edges: Avoid straight lines between old and new textures. Instead, create irregular edges to make the patch less noticeable. A putty knife can help achieve this by feathering out the joint compound.
- Layering: Sometimes, a single layer of texture won't be enough. Apply a second light layer if needed, ensuring each layer dries completely before adding another.
Painting Challenges
Painting over a textured ceiling can present its own set of challenges, especially if the color needs to match.
- Stainblocking Primer: Use a stainblocking primer to prevent any old water stains or discoloration from showing through the paint. This ensures a clean base for your paint.
- Full Ceiling Paint: Often, it’s best to paint the entire ceiling. This avoids the difficulty of color matching and ensures a uniform appearance throughout the room.
- Multiple Coats: Textured surfaces often require more paint than flat ones. Be prepared to apply multiple coats to achieve full coverage.
By addressing these challenges head-on, you can ensure a smooth and professional-looking orange peel texture ceiling repair. Armed with the right techniques and materials, even complex repairs can be accomplished with ease.
Frequently Asked Questions about Orange Peel Texture Ceiling Repair
How to repair orange peel texture on ceiling?
Repairing an orange peel texture ceiling involves a few key steps to ensure a seamless finish. First, prepare the area by cleaning and sanding any damaged spots. Then, use a spray texture product to apply the new texture. This method is effective for creating a uniform finish that matches the original texture.
- Quick Dry: Choose a quick-drying spray texture to speed up the repair process. This minimizes downtime and allows you to complete the project faster.
- Practice: Before applying the texture to the ceiling, practice on a scrap piece of drywall to perfect your technique.
- Blending: Feather the edges of the new texture to blend seamlessly with the existing surface. This helps avoid visible lines and ensures a smooth transition.
Can you remove orange peel ceiling?
Yes, you can remove an orange peel ceiling if desired. The process involves several steps to ensure the texture is completely removed:
- Water Removal: Begin by lightly misting the ceiling with water using a garden pump sprayer. This helps soften the texture for easier removal.
- Scraping: Once the texture is softened, use a putty knife or scraper to gently remove the texture. Be careful not to damage the drywall beneath.
- Sanding: After scraping, sand the ceiling to create a smooth surface. This step is essential before applying any new texture or paint.
How to fix peeling paint on textured ceiling?
Fixing peeling paint on a textured ceiling requires careful preparation and repair:
- Scraping: Start by scraping off any loose or peeling paint using a putty knife. This helps ensure a clean surface for new paint.
- Sanding: Sand the area to smooth out any rough edges and create a uniform surface.
- Patching Compound: Apply a patching compound to fill in any gaps or holes. Use a putty knife to smooth the compound and blend it with the surrounding area.
- Priming and Painting: Once the patching compound is dry, apply a stainblocking primer to prevent any old stains from showing through. Finish by painting the entire ceiling for a consistent appearance.
By following these steps, you can achieve a professional-looking orange peel texture ceiling repair, ensuring your ceiling looks as good as new.
Conclusion
At The Drywall Marketers, we understand that achieving a seamless finish and professional results with an orange peel texture ceiling repair can be challenging. However, with the right techniques and tools, you can transform your ceiling into a flawless surface.
Our expertise in digital marketing for drywall contractors means we're committed to helping you secure high-value projects by showcasing your skills in ceiling repairs and texture applications. By focusing on website design, SEO, and reputation management, we ensure that your business stands out in the local market.
Whether you're dealing with a minor repair or a complete ceiling makeover, the key to success lies in preparation and precision. From selecting the right spray texture to mastering blending techniques, each step is crucial. With patience and practice, you can achieve a finish that not only hides imperfections but also adds visual interest to any room.
For more information on how we can help you improve your drywall services, visit our Texture Application Services page. Let us help you deliver stunning results that your clients will appreciate and admire.
By leveraging our specialized marketing solutions, you can focus on what you do best—creating beautiful, textured ceilings that stand the test of time. Together, let's make your business the go-to choice for drywall texturing services in your area.